Hi creative friends, how are you all? It's been a long time since I wrote, this time I will share my simple but beautiful work.
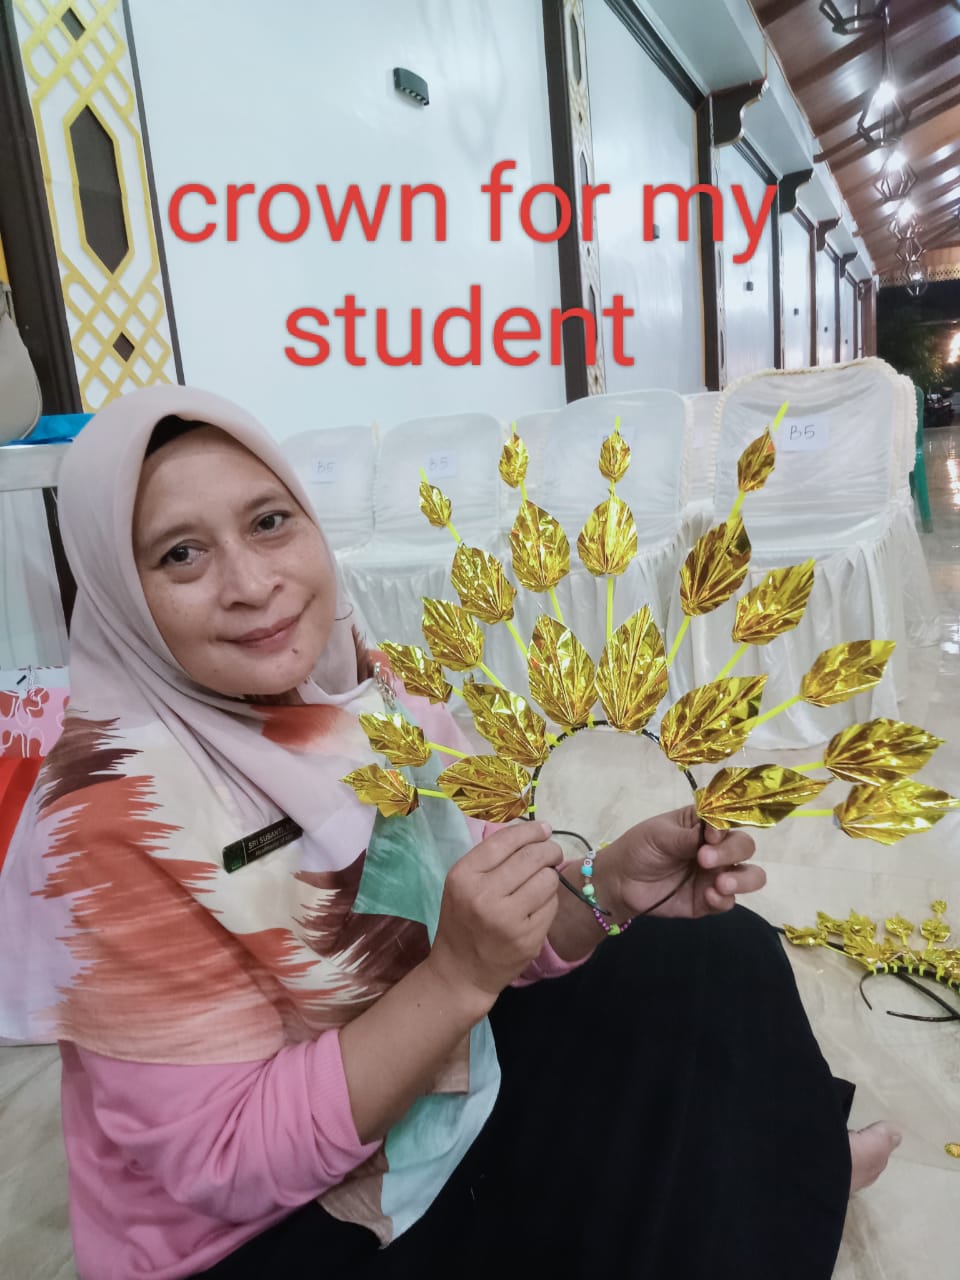
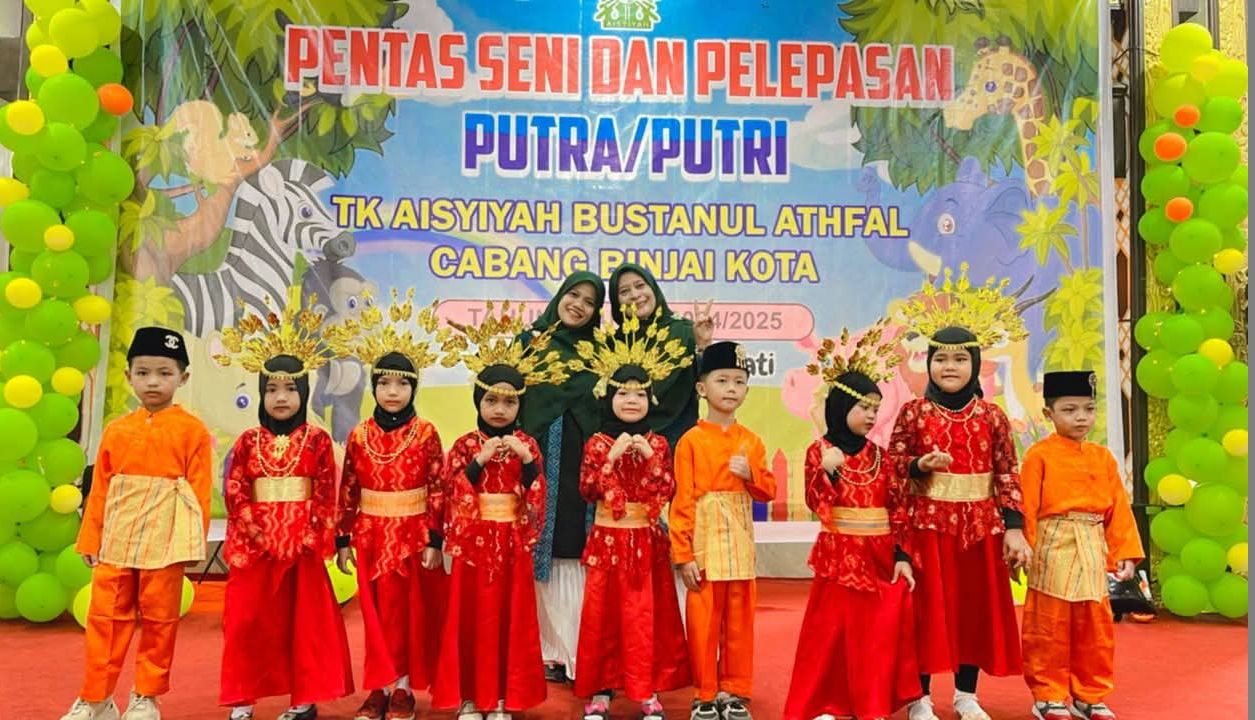
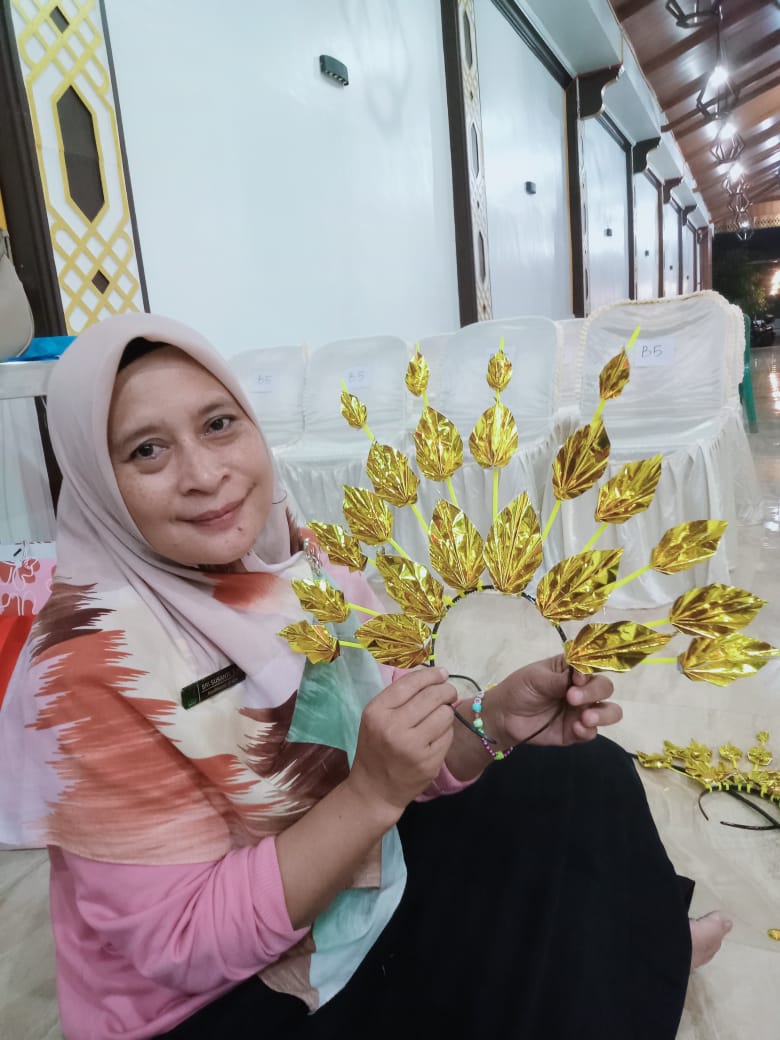
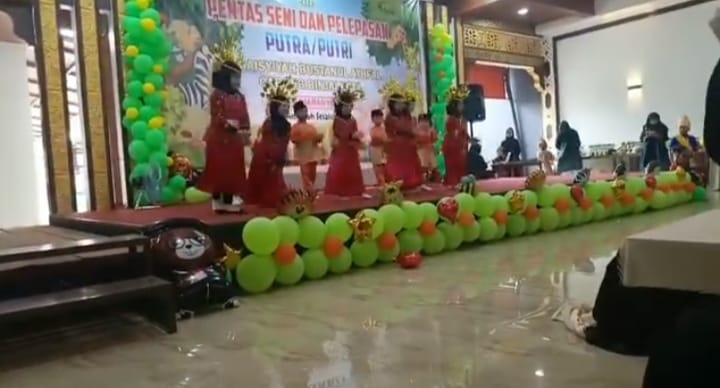
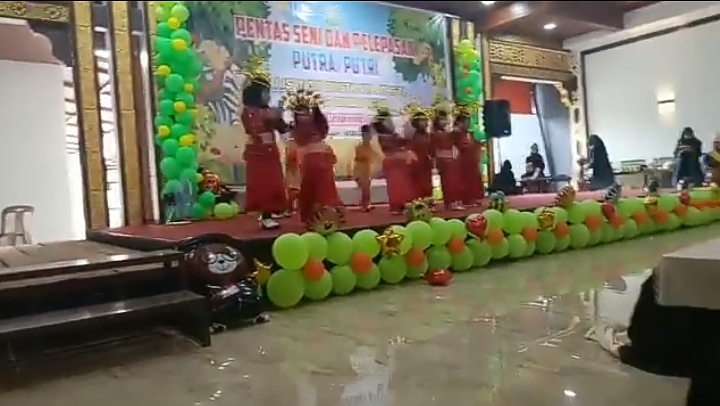
This time I will make beautiful crowns that I make as accessories for my students when they perform dancing at the end of school year arts performance event.
I made a crown from cable ties which are usually used to tie objects such as cables and automotive objects as well as other objects. It's very easy to make, you just need a little patience to get beautiful results.
 Let's just spill the ingredients and how to make it.
Material
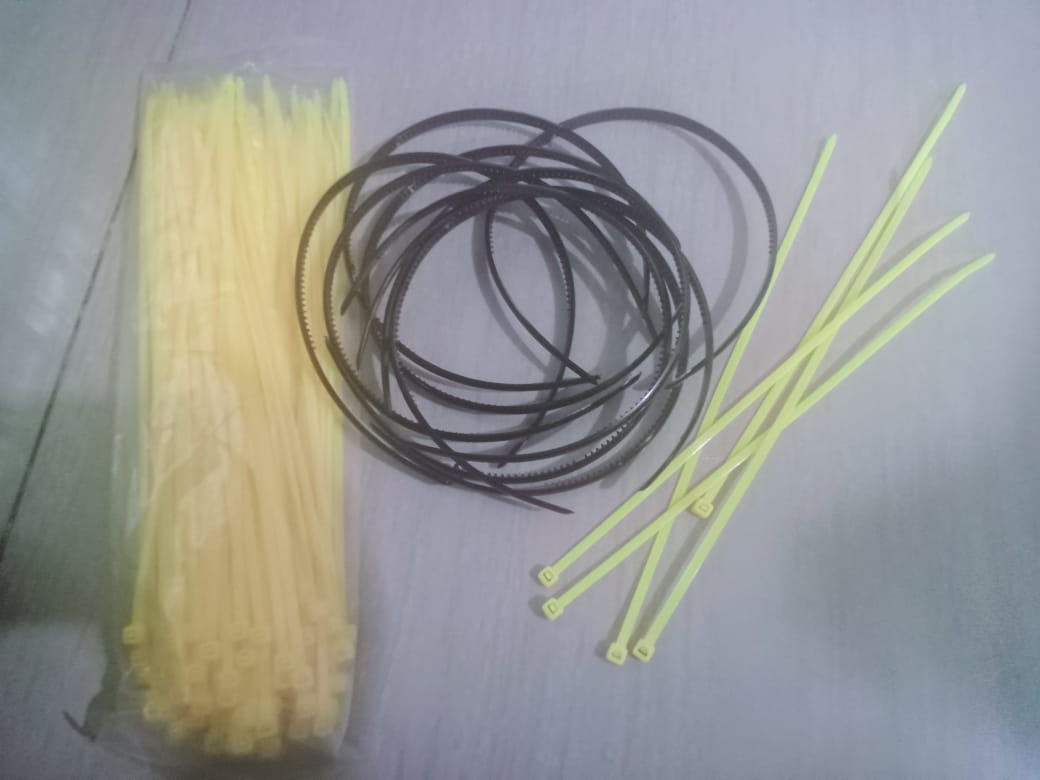
- Plain headband
- Cable ties
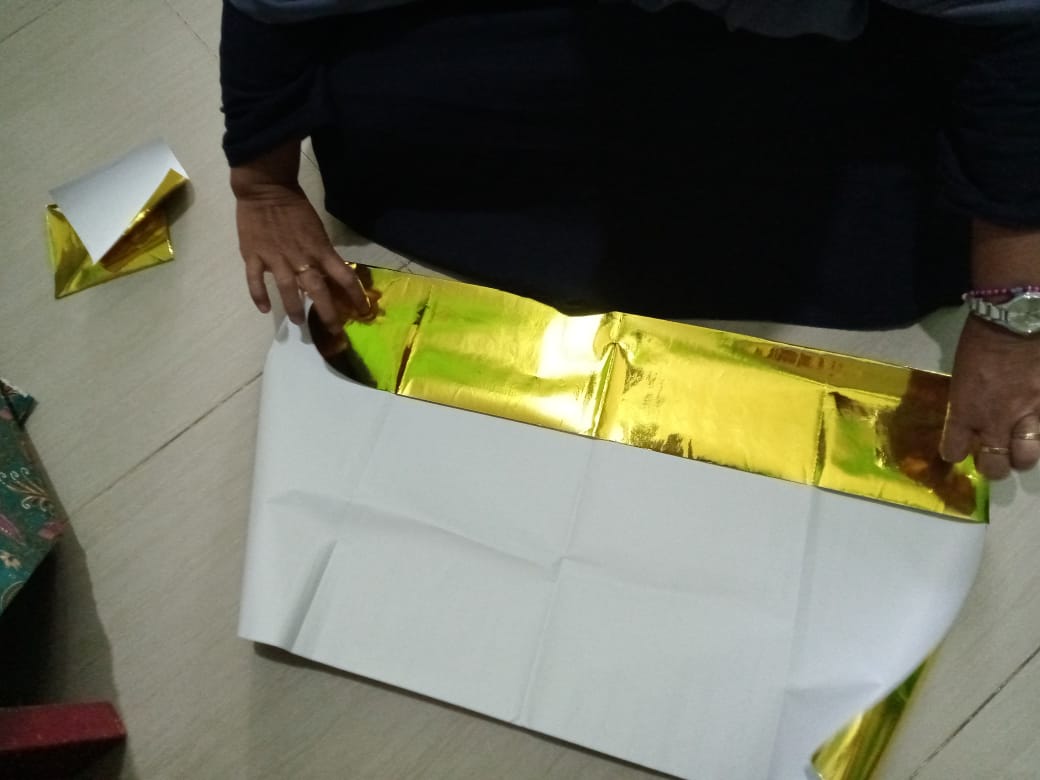
- Gold color manila paper
- Glue
Let's just spill the ingredients and how to make it.
Material
- Plain headband
- Cable ties
- Gold color manila paper
- Glue
 How to make
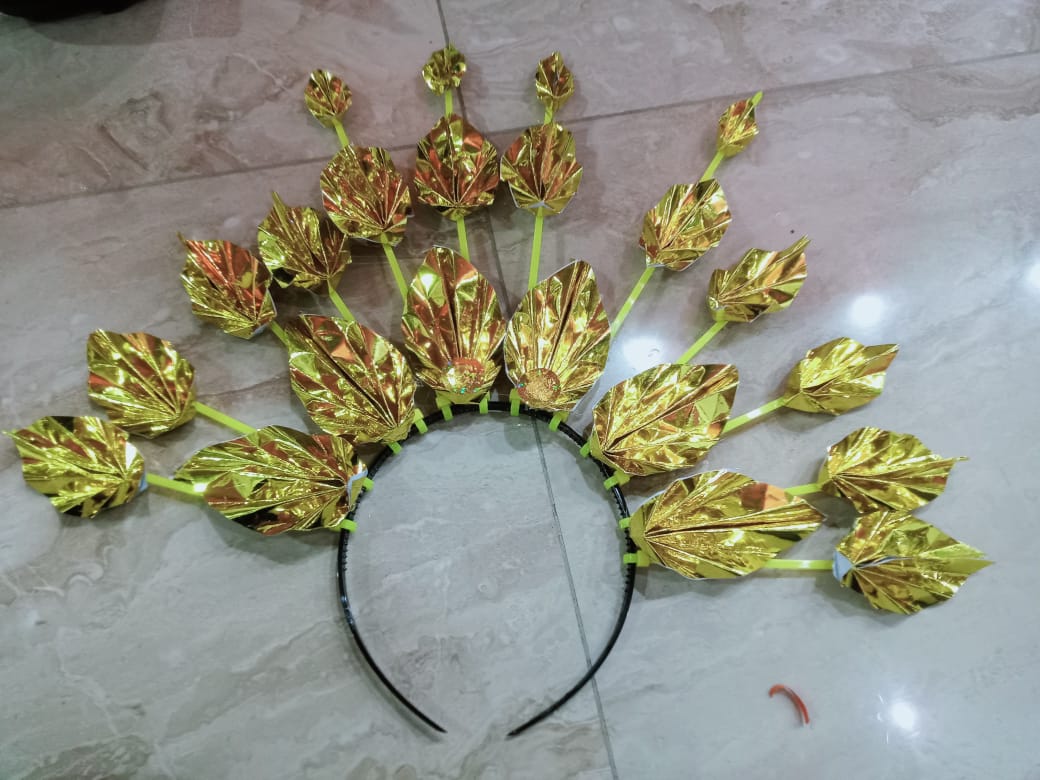
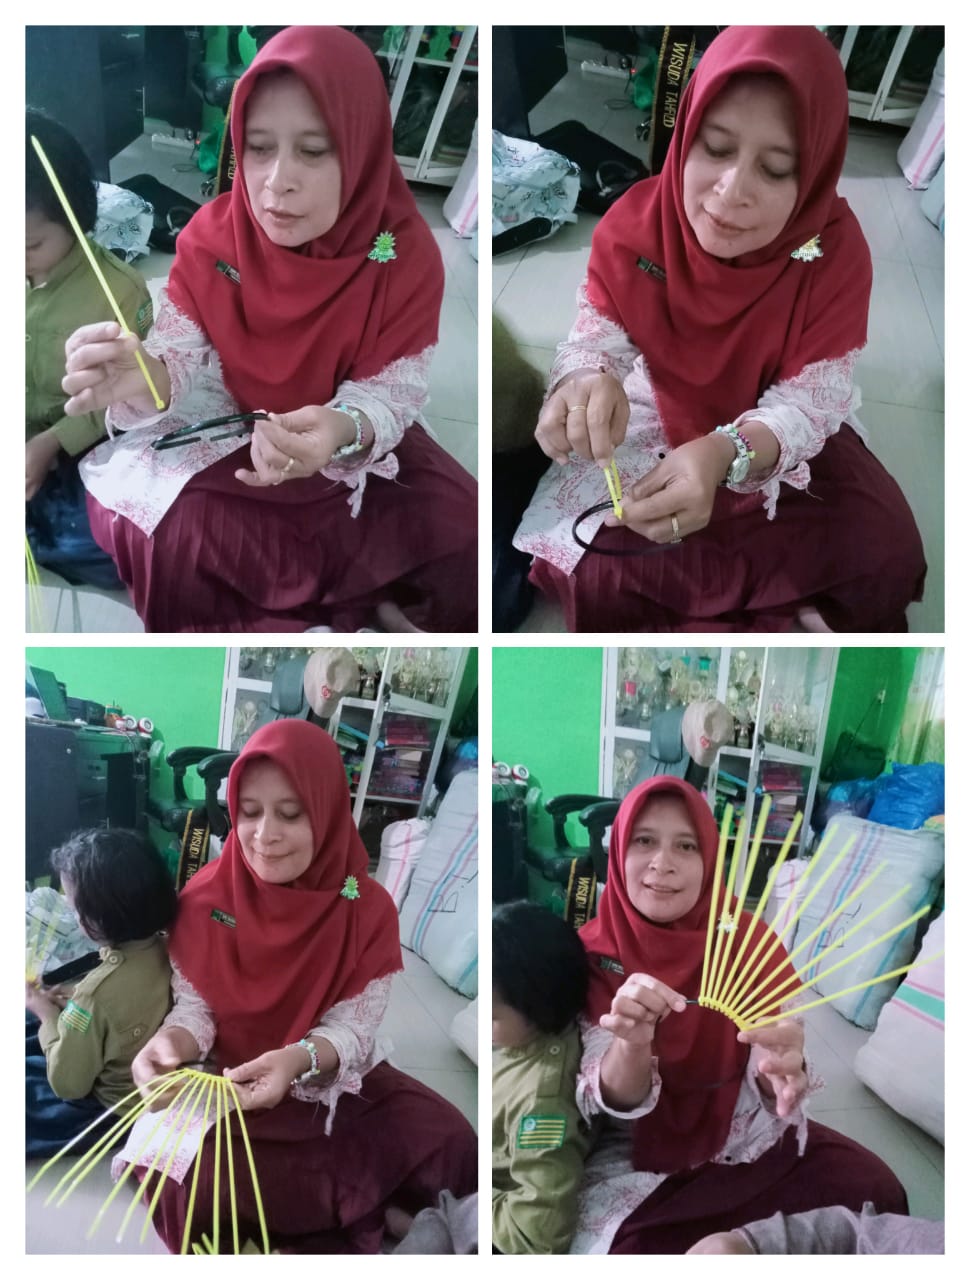
- Tie the ties cable to a plain headband in a position from the middle first, so that the shape will be even between the right and left edges. I need 12 cable ties to make one crown
How to make
- Tie the ties cable to a plain headband in a position from the middle first, so that the shape will be even between the right and left edges. I need 12 cable ties to make one crown
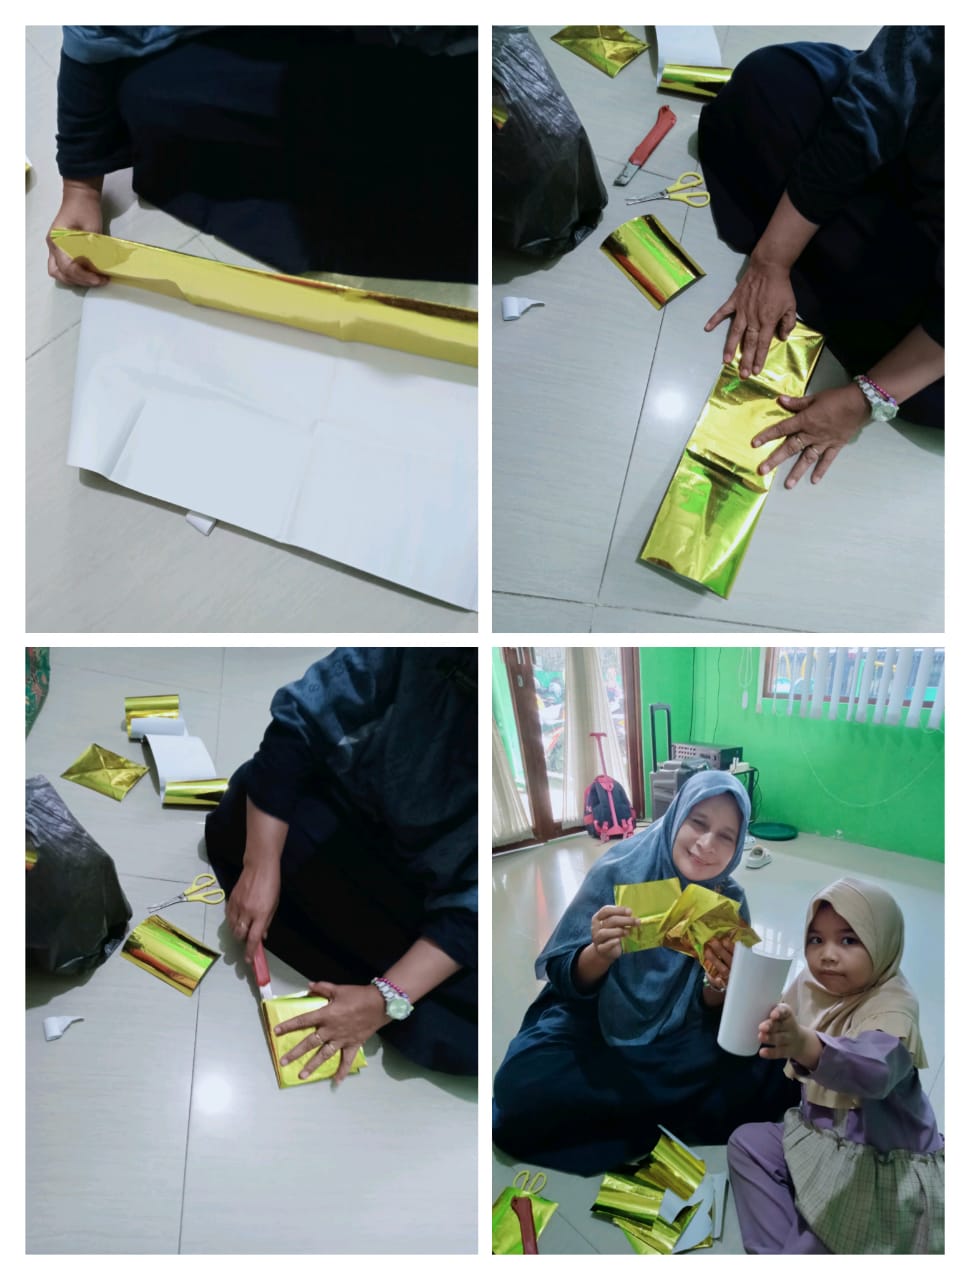
 Cut the manila paper into an equilateral rectangle with 3 sizes, namely 5 cm x 5 cm, then cut the manila paper into a smaller size of 3 cm x 3 cm. And even smaller manila paper, 1.5 cm x 1.5 cm
- Then fold the rectangular paper into a triangular shape by bringing the top and bottom ends together. After the paper becomes a triangle shape, continue folding the paper with the top and bottom folds so that the paper becomes a small long shape.
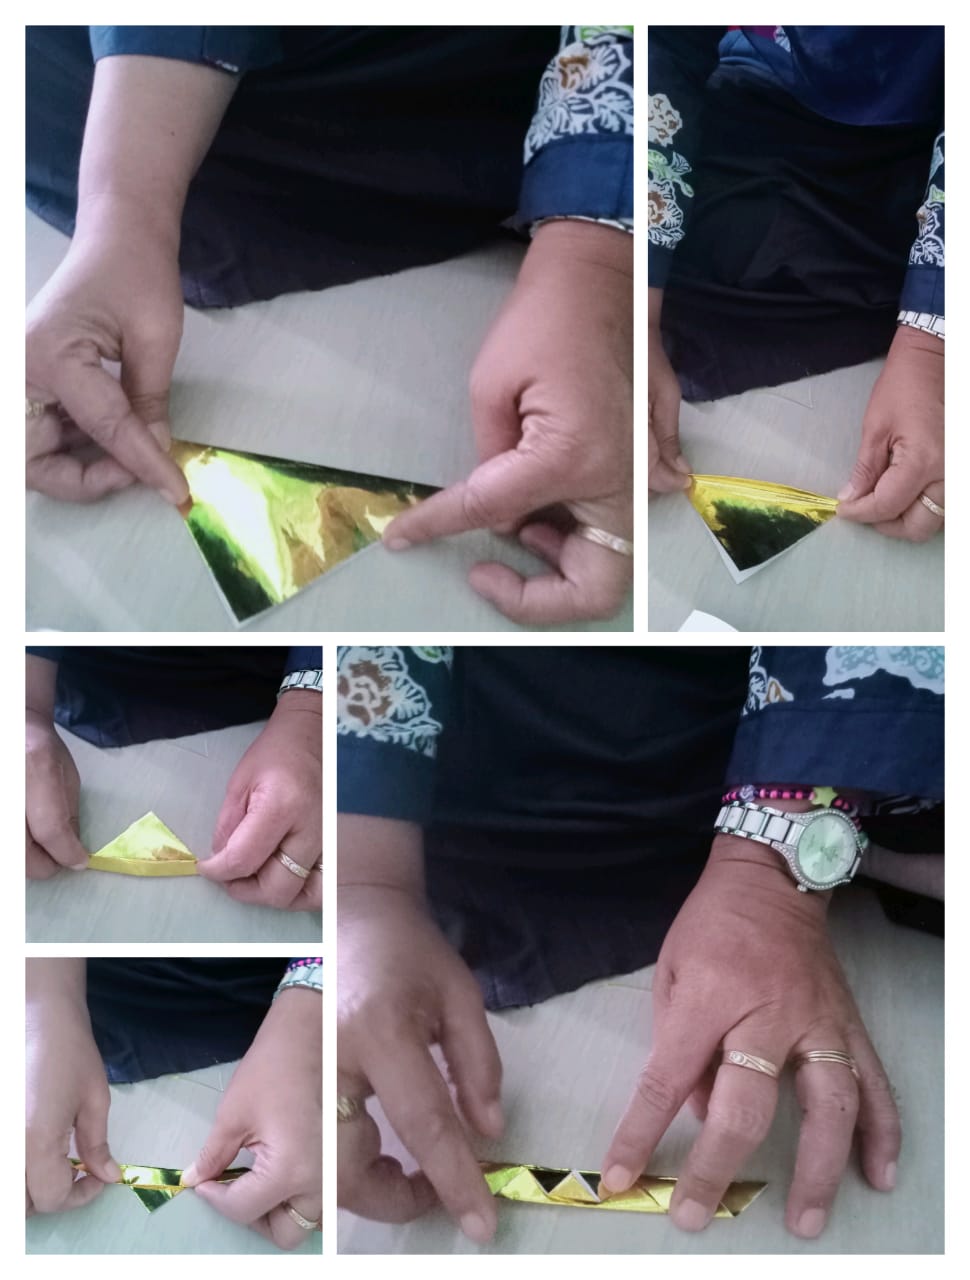
- Fold the paper that has been folded up and down into one by joining the ends of the right and left sides.
- Glue the middle of the fold, then open the fold, the paper will form like a leaf.
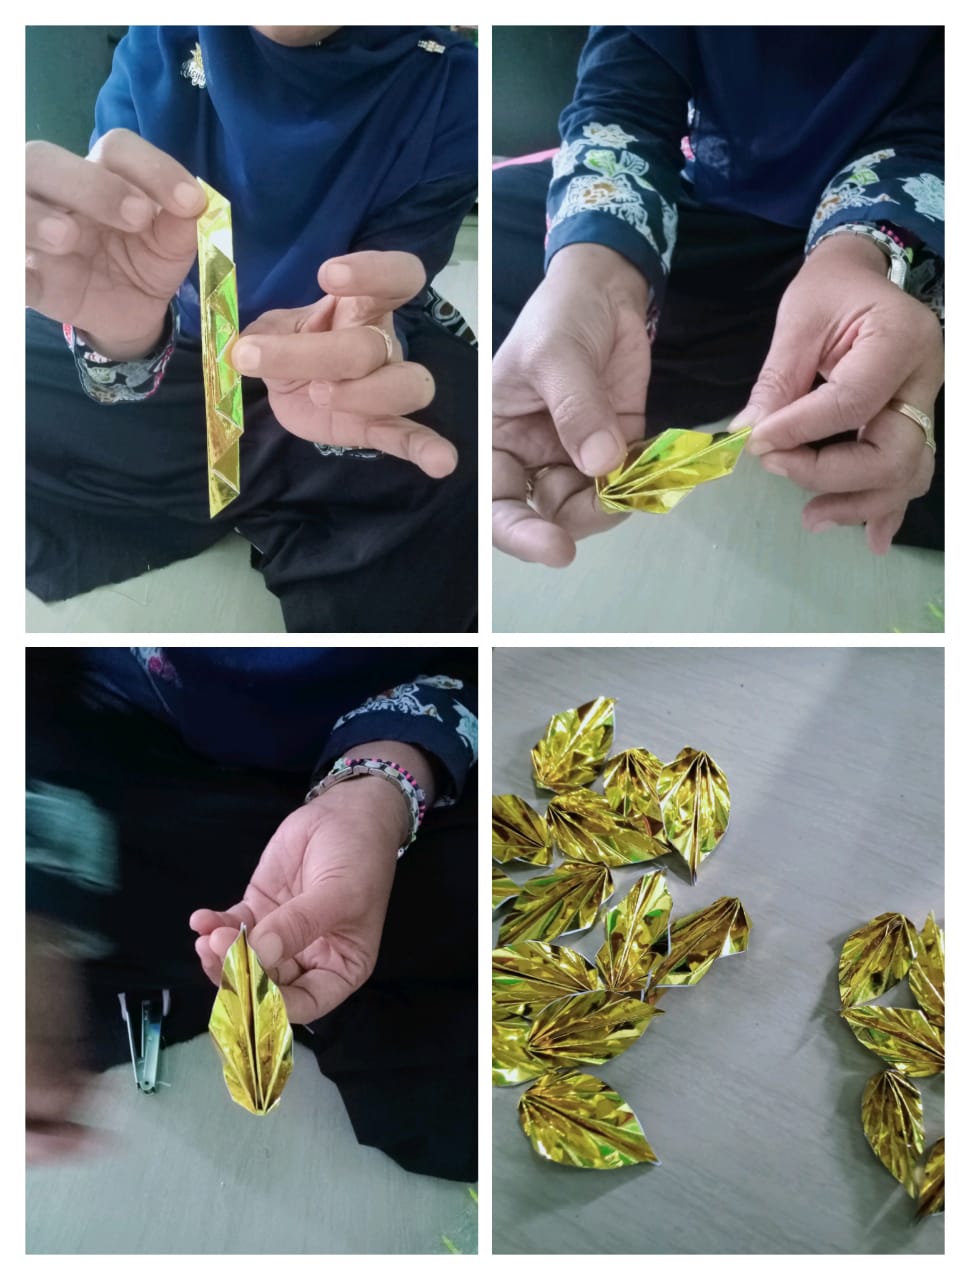 - Fold all the paper until finished. I need 6 papers measuring 5 cm x 5 cm, 12 papers measuring 3 cm x 3 cm and 4 papers measuring 2 cm x 2 cm for one crown.
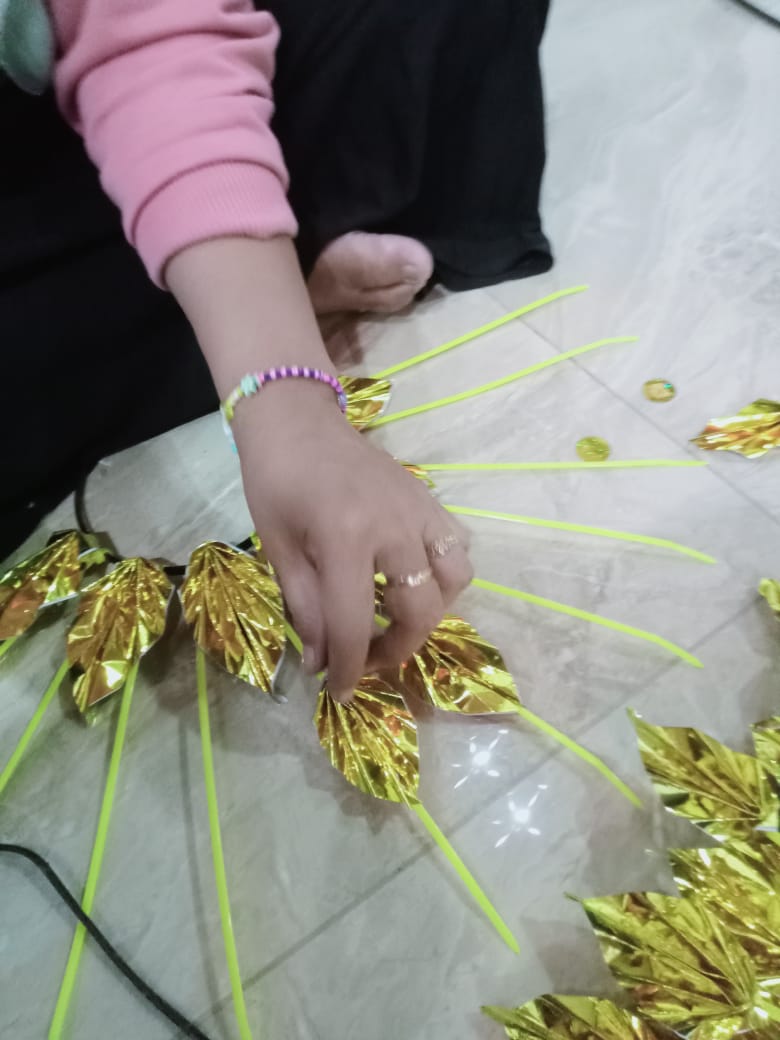
- After the paper has been folded into a leaf shape, then attach it to the headband with the cable ties attached using glue.
- Fold all the paper until finished. I need 6 papers measuring 5 cm x 5 cm, 12 papers measuring 3 cm x 3 cm and 4 papers measuring 2 cm x 2 cm for one crown.
- After the paper has been folded into a leaf shape, then attach it to the headband with the cable ties attached using glue.
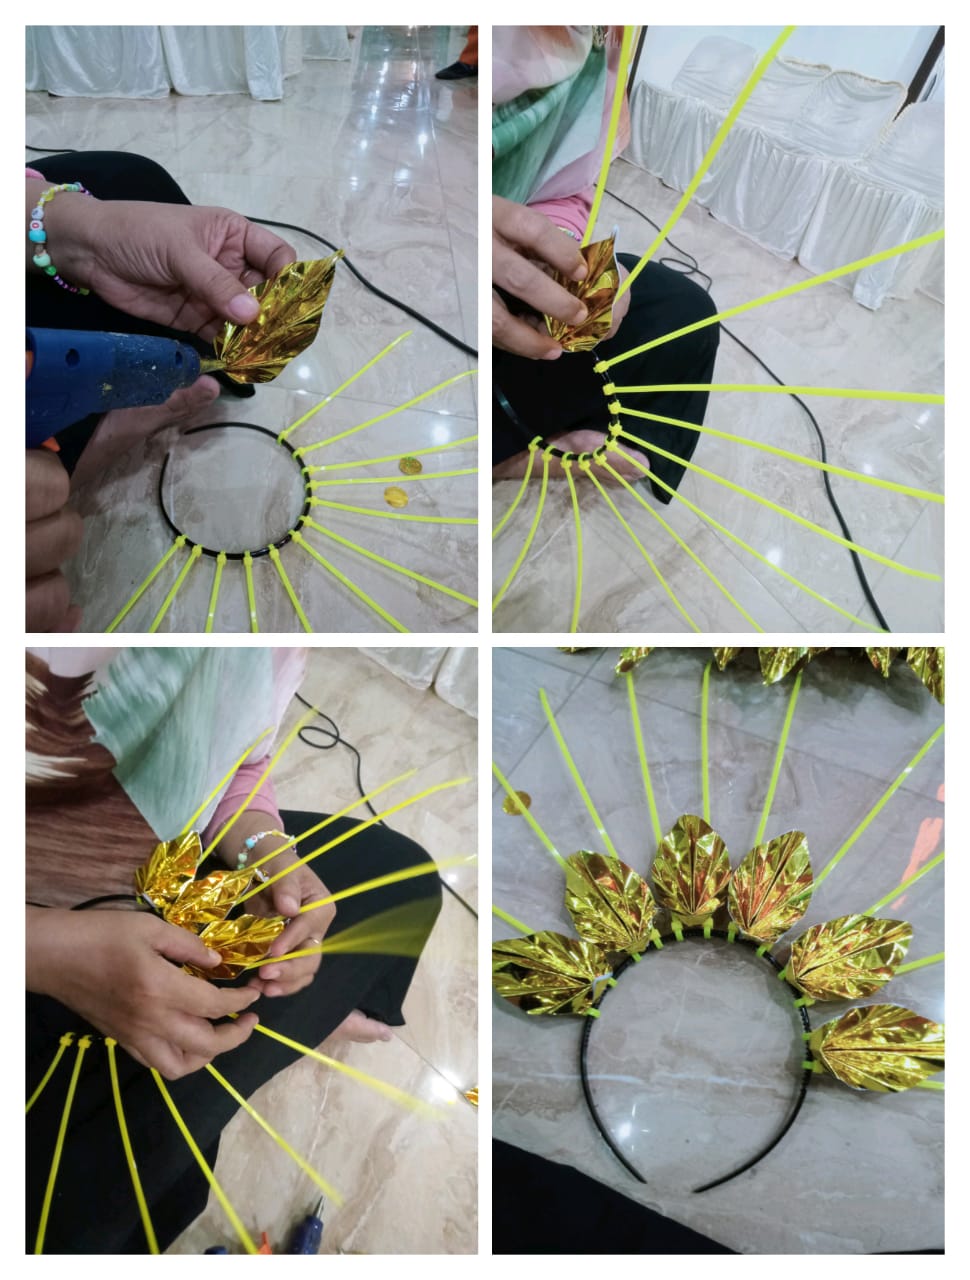 - For the bottom, use a large leaf fold, stick it between the ties cables by applying glue to the right and left side of the leaf fold.
- For the second part, attach a medium-sized leaf fold to the ties cable. To attach the leaf fold, it is best to place the edge rather low, then as you move towards the center, the more the leaf fold is attached, so that the shape becomes a semi-circle.
- For the bottom, use a large leaf fold, stick it between the ties cables by applying glue to the right and left side of the leaf fold.
- For the second part, attach a medium-sized leaf fold to the ties cable. To attach the leaf fold, it is best to place the edge rather low, then as you move towards the center, the more the leaf fold is attached, so that the shape becomes a semi-circle.
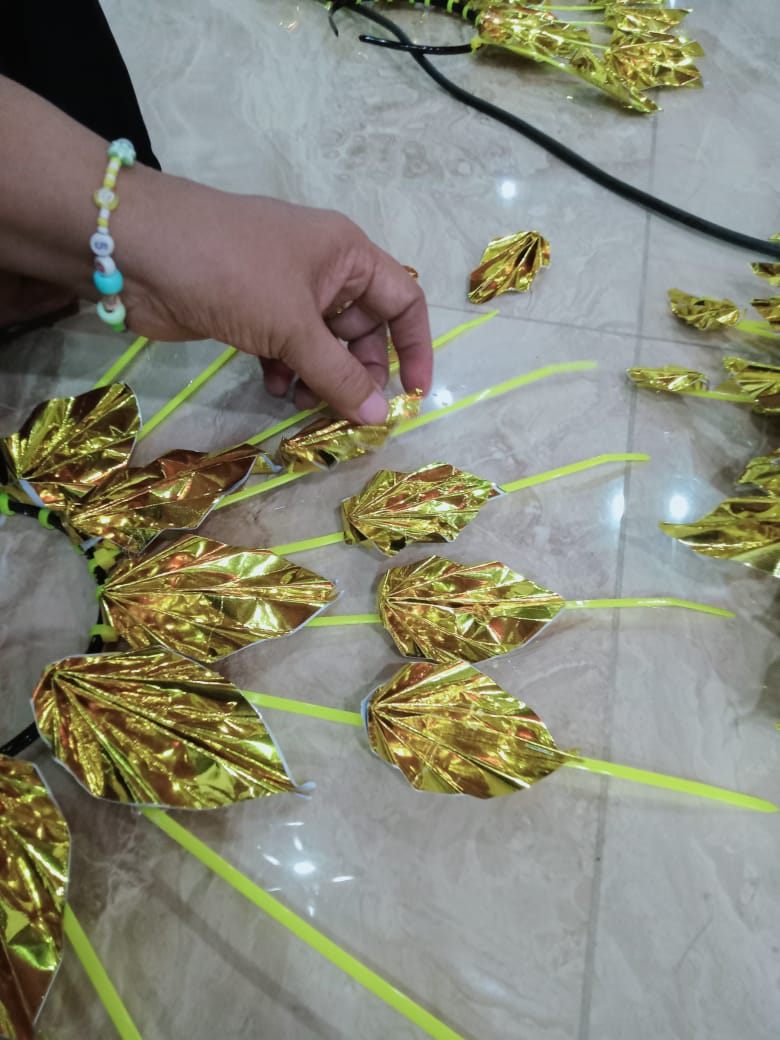 - And finally, attach a small leaf fold to the tie cable in the middle above the second leaf fold.
- To keep the shape neat, cut the end of the ties cable right at the end of the leaf fold so it doesn't look long.
- And finally, attach a small leaf fold to the tie cable in the middle above the second leaf fold.
- To keep the shape neat, cut the end of the ties cable right at the end of the leaf fold so it doesn't look long.
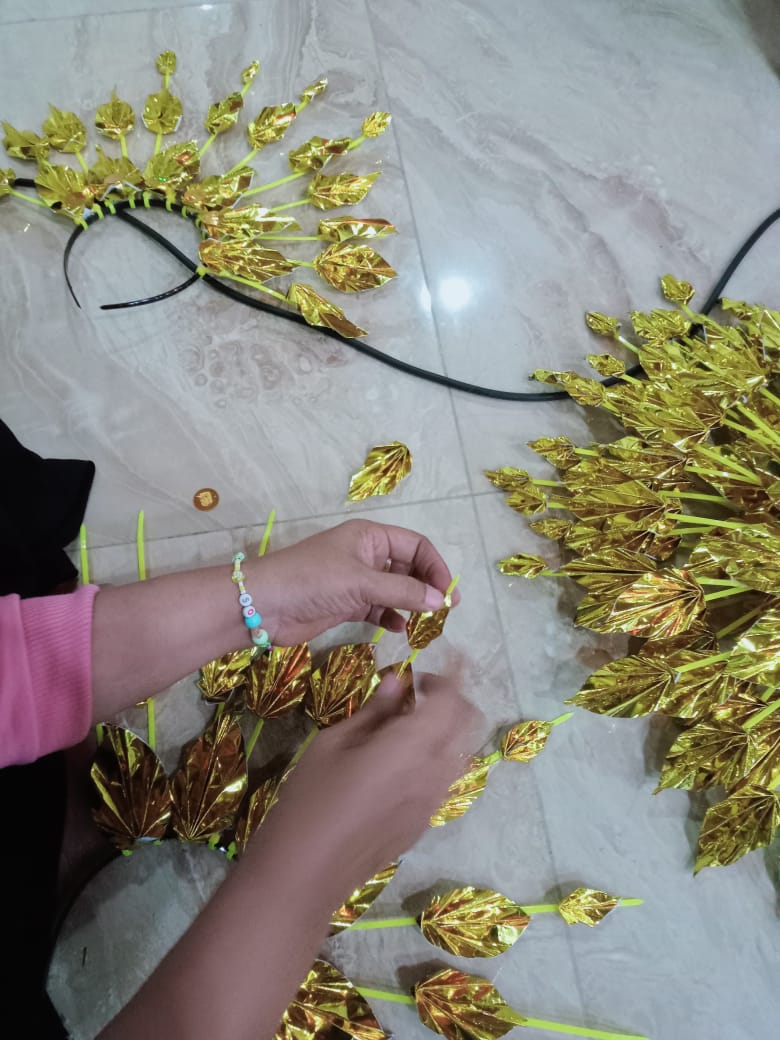
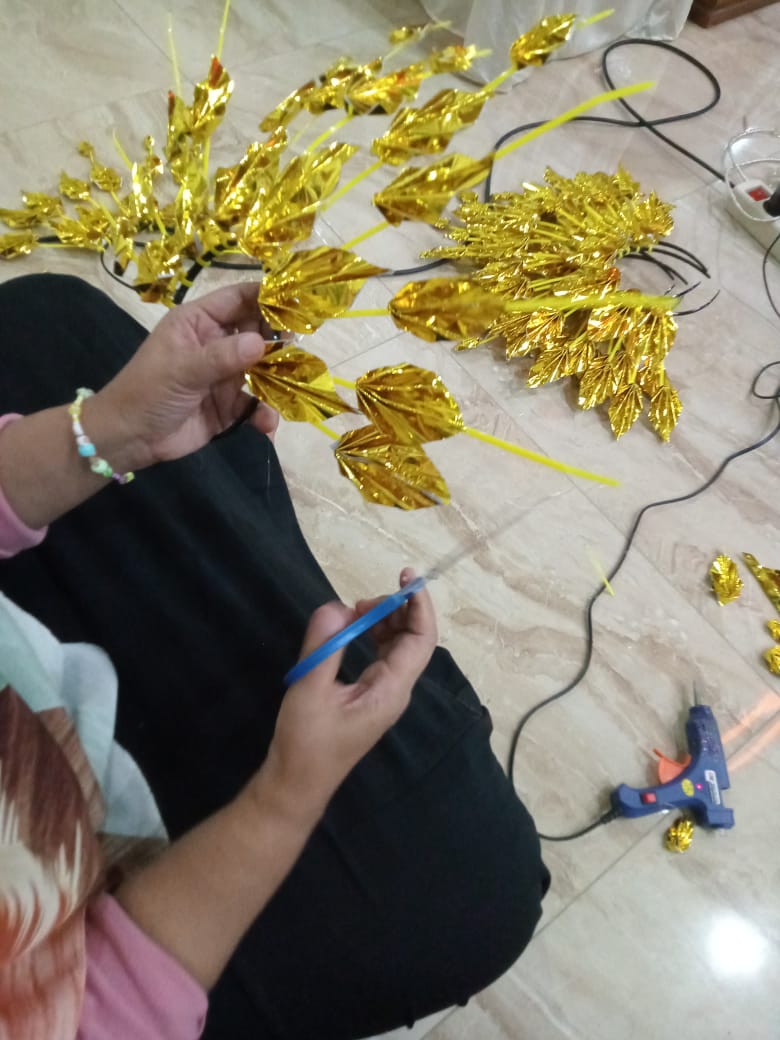
- If you don't understand my explanation, maybe you can see a photo of the manufacturing process.
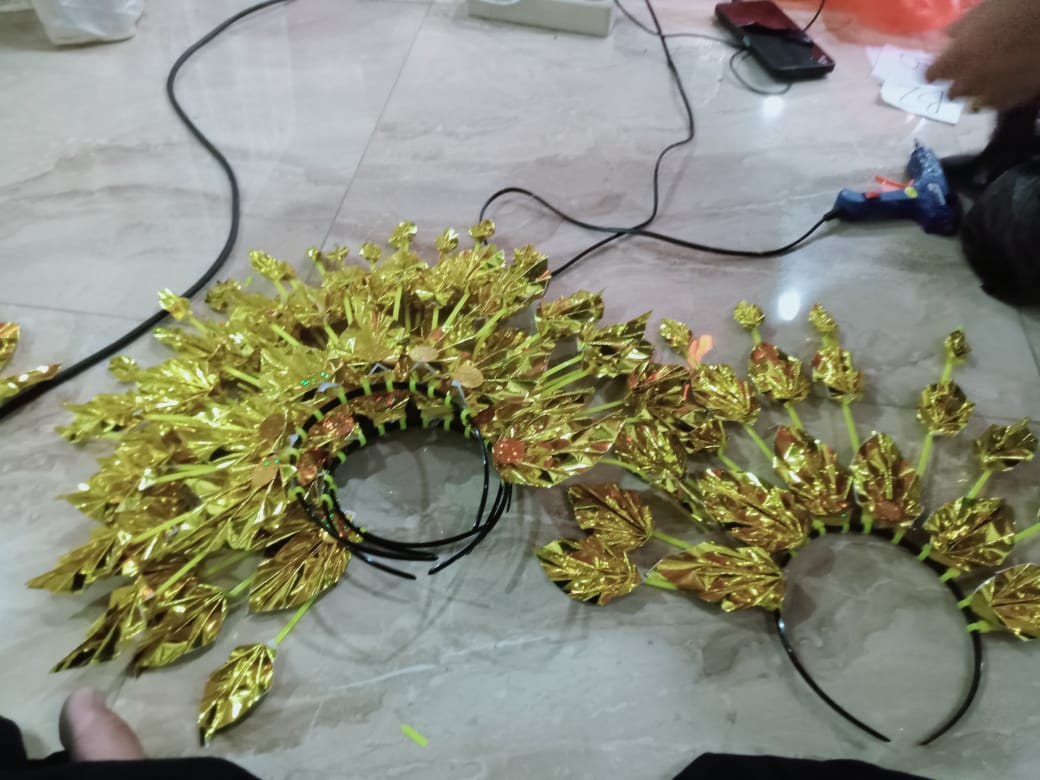
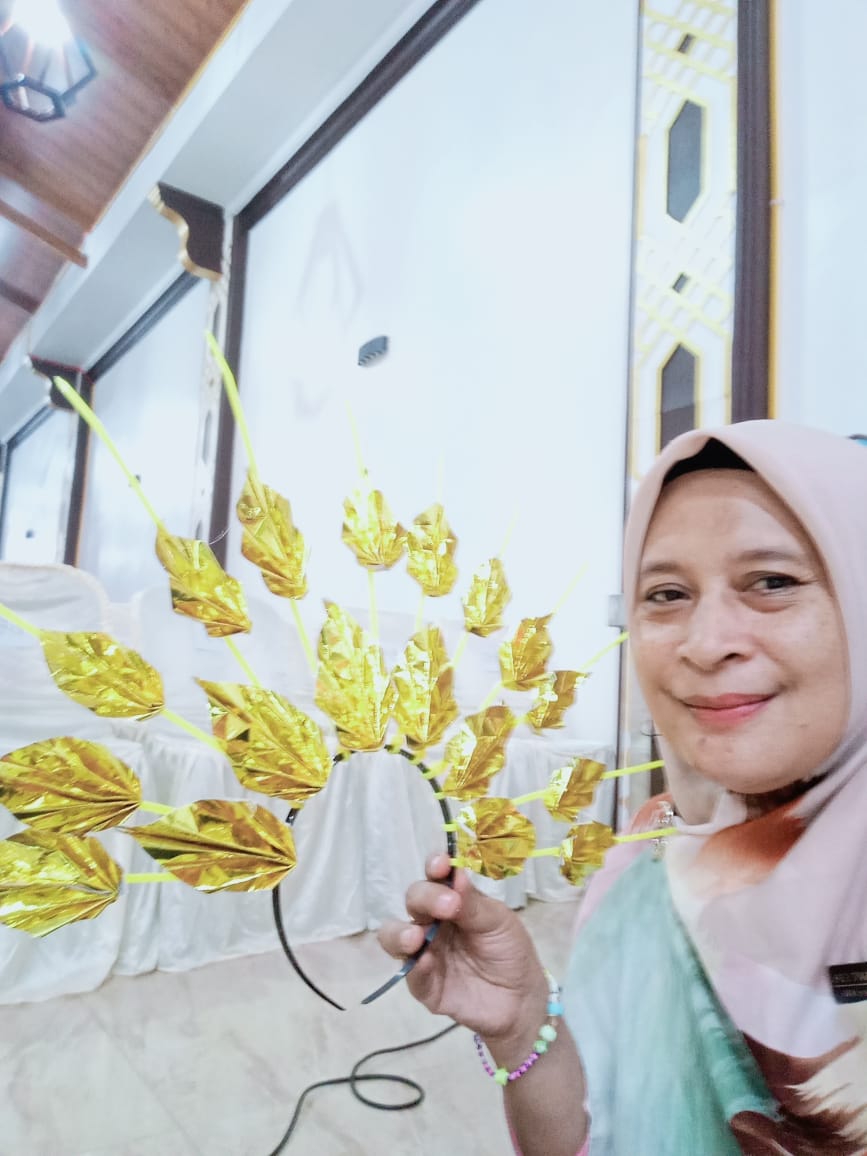
And tarraaa....my beautiful crown is ready..and so gracefully worn by my students in their dancing display. I'm very happy, they look beautiful and their dance also looks beautiful.
 Ok...thank you all creative friends, here are the results of my work today, I hope it's useful. Always healthy greetings and long hugs to all of you.